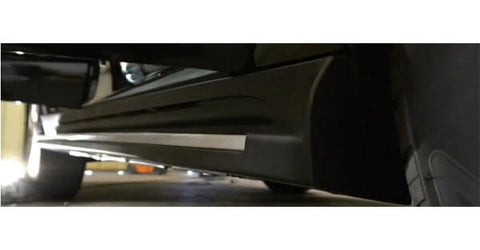
If you've recently purchased truck running boards, it's essential to know how to install them. The running boards are usually located on either side of the door's bottom, and they are mostly used in trucks and SUVs. A good set of running boards can help you board tall vehicles comfortably. This installation guide will help you install a new set of running boards on your truck in no time, giving you a safe, slip-resistant way to get in and out of the cab. Check out YITAMOTOR's running boards and Side Steps for different makes and models.
You will get these:
1. Convenient. Solve the inconvenience that SUVs are generally higher off the ground
2. Beautiful. Running boards are used as a decoration to personalize the car's look.
3. Clean. Nerf running boards can block some of the muddy water when it rains
Nerf bars and running boards installation
Some tools are required before installing the running boards—ratchet, socket Set, Box End Wrenches, Safety Glasses and Gloves, Creeper, etc. Different makes and models of trucks, jeeps, and SUVs may match with dedicated running boards. Regardless, this running boards installation tutorial is generic.

Step 1: Check Your Parts
You should unbox the new running boards and ensure all parts are present before assembly. Go against the manufacturer's list and check the hardware before starting.

Step 2: Install the Bolt Plate
The bolt plate is the part that holds the bracket in place. Find the hole position of the mounting frame on the car's chassis. Note that the hole position here is the original car hole position, and no manual drilling is required. Then fix the bracket with screws. Be careful not to tighten the screws at this time; otherwise, the running boards cannot be installed well.
Step 3: Install the Brackets
There are three brackets on the left and right, front, middle, and rear, and text descriptions on the brackets. Start with the front rack. Hand-tighten the bracket as you may need to make some adjustments later. It should be noted that only the front and rear brackets are equipped with T-bolts, and the middle bracket uses the screws reserved for the original car. Make sure to use the correct bolts, nuts, and washers.
Step 4: Install the running boards
After the bracket is fixed, loosen the nut on the back of the running board. The loosened nuts are left to secure the pedals. Place your running boards on the bracket and carefully align the threaded rods on the pedals with the holes in the bracket. After adjusting the position of the running boards, you can tighten all the screws. Ensure the board is centered correctly, so it doesn't interfere or become any obstacle.
Step 5: Check
After the running boards are installed, it needs to achieve a high degree of fit with the body, and there is no visible gap at all. And the effect of a strong sense of unity with the body is achieved.
More information about:
- How to install running boards on Chevy traverse?
- How to install running boards on Ford explorer?
- How to install running boards on the Nissan frontier?
- How to install running boards on Acura MDX?
- How to install running boards on Dodge ram?


